In this example we connect a GY-21P sensor to an ESP32 and then we will upload the data to Thingspeak
The GY-21P combines a BMP280 sensor and an SI7021 sensor. The on-board BMP280+SI7021 sensor measures atmospheric pressure from 30kPa to 110kPa as well as relative humidity and temperature. Perfect for a weather station

Thingspeak setup
You will now need to create a new account at thingspeak – https://thingspeak.com. Once done create a new channel and add one new field called temperature. You can see this in a screen capture of my simple channel, notice the ChannelID you will need that in your code later.
You can also fill in other fields such as Name, description and there are a few others as well. The key one(s) are Field1, Field 2 , Field 3, Field 4 and Field 5 – this effectively is the data you send to thingspeak
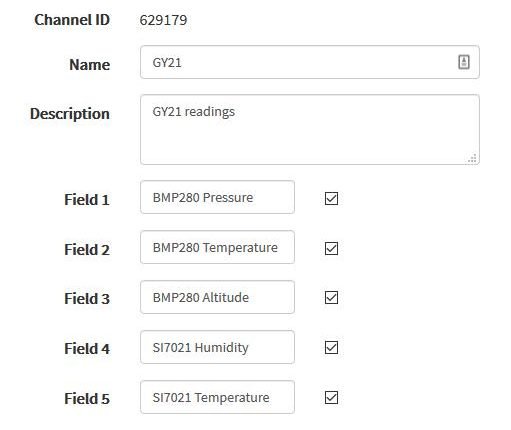
GY-21P setup in thingspeak
Parts List
| Name | Link | |
| ESP32 | 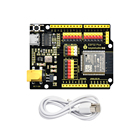 |
|
| GY-21P | ||
| Connecting cables |  |
Schematics/Layout
Connect the sensor to the ESP32
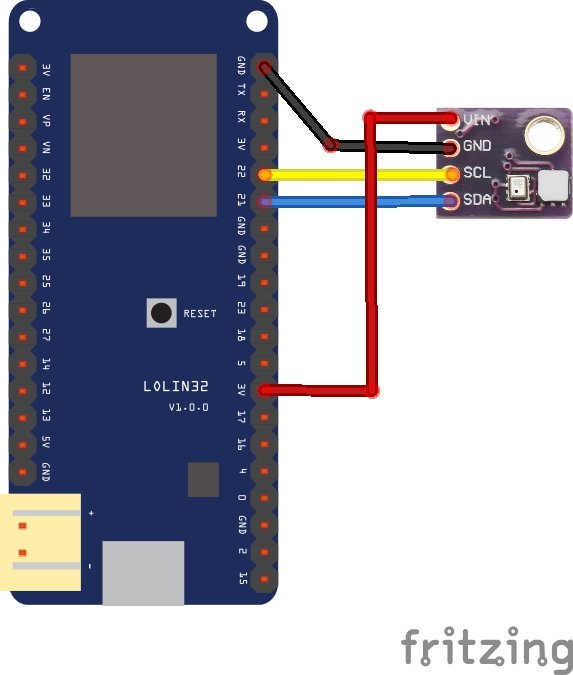
esp32 and GY21P
Code
I use a variety of Adafruit libraries and also the Thingspeak libraries for this example
https://github.com/adafruit/Adafruit_Sensor
https://github.com/adafruit/Adafruit_BMP280_Library
https://github.com/adafruit/Adafruit_Si7021
https://github.com/mathworks/thingspeak-arduino
I got the sea level pressure value from this link
#include "ThingSpeak.h"
#include <WiFi.h>
#include <Wire.h>
#include <Adafruit_Sensor.h>
#include <Adafruit_BMP280.h>
#include "Adafruit_Si7021.h"

char ssid[] = "networkssid"; // your network SSID (name)
char pass[] = "networkpassword"; // your network password
int keyIndex = 0; // your network key Index number (needed only for WEP)
WiFiClient client;

unsigned long myChannelNumber = 000000; //update
const char * myWriteAPIKey = "yourapikey"; //update

Adafruit_BMP280 bmp; // I2C
Adafruit_Si7021 sensor = Adafruit_Si7021();

void setup()
{
Serial.begin(115200); //Initialize serial
if (!bmp.begin())
{
Serial.println("Could not find a valid BMP280 sensor, check wiring!");
while (1);
}

if (!sensor.begin())
{
Serial.println("Did not find Si7021 sensor!");
while (true);
}
delay(10);
WiFi.mode(WIFI_STA);
ThingSpeak.begin(client); // Initialize ThingSpeak

}

void loop() {

// Connect or reconnect to WiFi
if(WiFi.status() != WL_CONNECTED){
Serial.print("Attempting to connect to SSID: ");
//Serial.println(SECRET_SSID);
while(WiFi.status() != WL_CONNECTED){
WiFi.begin(ssid, pass); // Connect to WPA/WPA2 network. Change this line if using open or WEP network
Serial.print(".");
delay(5000);
}
Serial.println("\nConnected.");
}

float bmpPressure = bmp.readPressure();
float bmpTemperaturee = bmp.readTemperature();
float bmpAltitude = bmp.readAltitude(1024);
float siHumidity = sensor.readHumidity();
float siTemperature = sensor.readTemperature();
// Write to ThingSpeak. There are up to 8 fields in a channel, allowing you to store up to 8 different
// pieces of information in a channel.
ThingSpeak.setField(1, bmpPressure);
ThingSpeak.setField(2, bmpTemperaturee);
ThingSpeak.setField(3, bmpAltitude);
ThingSpeak.setField(4, siHumidity);
ThingSpeak.setField(5, siTemperature);

// write to the ThingSpeak channel
int x = ThingSpeak.writeFields(myChannelNumber, myWriteAPIKey);
if(x == 200){
Serial.println("Channel update successful.");
}
else{
Serial.println("Problem updating channel. HTTP error code " + String(x));
}

delay(20000); // Wait 20 seconds to update the channel again
}
Output
Open the serial monitor and verify you are connecting and the data has been successfully
Attempting to connect to SSID: .
Connected.
Channel update successful.
Channel update successful.
Channel update successful.
Channel update successful.
Channel update successful.
Lets look at our Thingspeak channel, all going well you should see data like the following
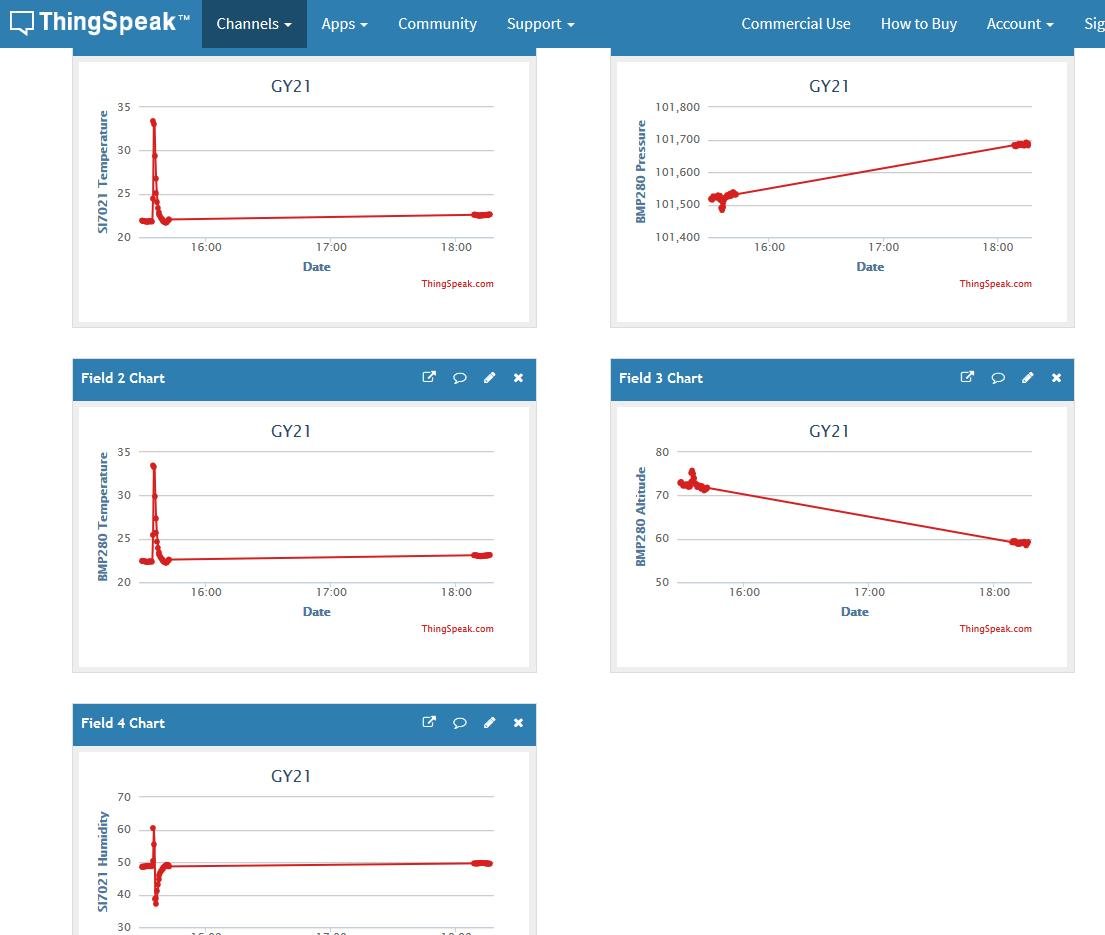
GY21P and Thingspeak data
Links