In this article, we look at a Triple-axis Magnetometer, the MMC5603, and connect it to an ESP32 board
Sensor Information
This sensor can sense ranges from ±30 Gauss (±3000uT or ±3mT) with no range-setting required and full 20-bit output up to 1000 Hz rate reading. The range makes it good for reading Earth’s magnetic field (which maxes at about 0.6 Gauss) or some basic magnets. It isn’t good for very strong rare earth magnets
I bought an Adafruit breakout board, so the MMC5603 comes integrated with a voltage regulator and level-shifting circuitry to allow it to be used with 3.3V devices or 5V devices.
Along with a header, there is a SparkFun Qwiic compatible STEMMA QT connectors for the I2C bus so you just need to fit a suitable cable
Features
-
- Superior Dynamic Range and Accuracy:
±30 G FSR - 20bits operation mode
- 0.0625mG per LSB resolution
- 2 mG total RMS noise
- Enables heading accuracy of 1º
- Superior Dynamic Range and Accuracy:
Sensor true frequency response up to 1KHz
On-chip automatic degaussing with built-in SET/RESET function
-
- Eliminates thermal variation-induced offset error (Null field output)
- Clears the residual magnetization resulting
from strong external fields
On-chip sensitivity compensation
On-chip temperature sensor
Selftest signal available
Data_ready Interrupt (I3C only)
Low power consumption
1 µA power down current
I2C slave, FAST (≤400 KHz) mode
I3C interface available
1.62V to 3.6V
Parts Required
You can connect to the sensor using Dupont style jumper wire.
| Name | Link | |
| ESP32 | 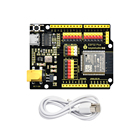 |
|
| MMC5603 | ||
| Connecting cables | 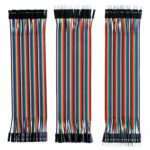 |
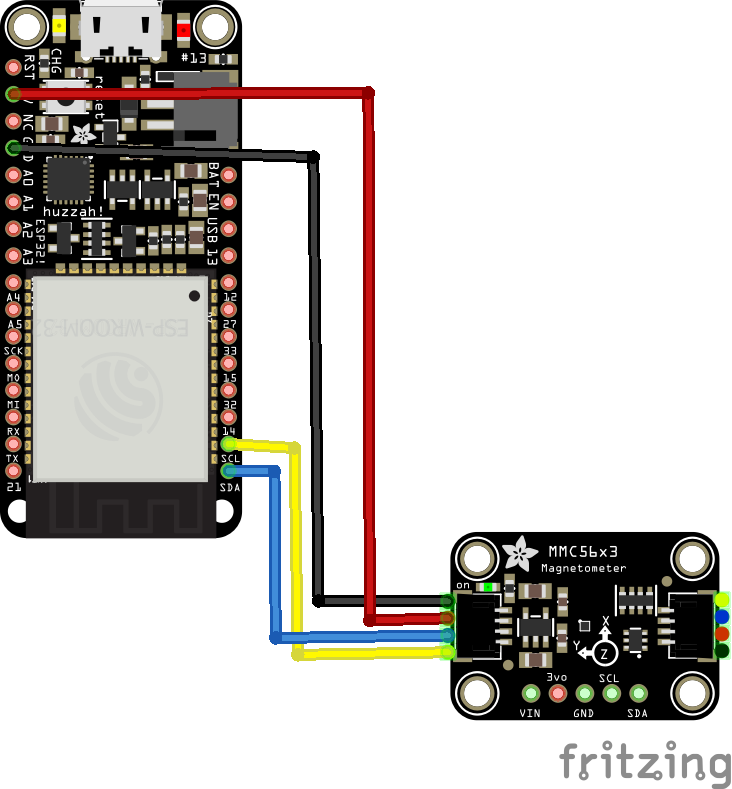
Schematic/Connection
I used 3.3v from the ESP32 – and I also use the stemma/qwic connector
Code Example
I installed the Adafruit library using the Arduino ide which also installed the dependency library
Click the Manage Libraries … menu item, search for MMC56x3, and select the Adafruit_MMC56x3 library
If asked about dependencies, click on the “Install all” option
If the Dependencies window does appear, you already have the required dependencies installed.
If the dependencies are already installed, make sure that you have the latest ones installed using the Arduino Library Manager
This is the magsensor example – there are a few examples
#include <Adafruit_MMC56x3.h>

/* Assign a unique ID to this sensor at the same time */
Adafruit_MMC5603 mmc = Adafruit_MMC5603(12345);

void setup(void) {
  Serial.begin(115200);
  while (!Serial)
    delay(10); // will pause Zero, Leonardo, etc until serial console opens

  Serial.println("Adafruit_MMC5603 Magnetometer Test");
  Serial.println("");

  /* Initialise the sensor */
  if (!mmc.begin(MMC56X3_DEFAULT_ADDRESS, &Wire)) {  // I2C mode
    /* There was a problem detecting the MMC5603 ... check your connections */
    Serial.println("Ooops, no MMC5603 detected ... Check your wiring!");
    while (1) delay(10);
  }

  /* Display some basic information on this sensor */
  mmc.printSensorDetails();
}

void loop(void) {
  // Get a new sensor event
  sensors_event_t event;
  mmc.getEvent(&event);

  // Display the results (magnetic vector values are in micro-Tesla (uT))
  Serial.print("X: ");
  Serial.print(event.magnetic.x);
  Serial.print("  ");
  Serial.print("Y: ");
  Serial.print(event.magnetic.y);
  Serial.print("  ");
  Serial.print("Z: ");
  Serial.print(event.magnetic.z);
  Serial.print("  ");
  Serial.println("uT");

  // Read and display temperature
  float temp_c = mmc.readTemperature();
  Serial.print("Temp: ");
  Serial.print(temp_c);
  Serial.println(" *C");
  // Delay before the next sample
  delay(1000);
}
Here is an example of what I saw in the serial monitor window – you may see some different results
X: -3276.80 Y: -3276.80 Z: -3276.80 uT
Temp: 21.00 *C
X: -3276.80 Y: -3276.80 Z: -3276.80 uT
Temp: 25.00 *C
X: -3276.80 Y: -3276.80 Z: -3276.80 uT
Temp: 25.80 *C
This is the compass example – this would be good with one of those round LCD displays – a clue to a future project
#include <Adafruit_MMC56x3.h>

/* Assign a unique ID to this sensor at the same time */
Adafruit_MMC5603 mag = Adafruit_MMC5603(12345);

void setup(void) {
  Serial.begin(115200);
  while (!Serial)
    delay(10); // will pause Zero, Leonardo, etc until serial console opens

  Serial.println("Adafruit_MMC5603 Magnetometer Compass");
  Serial.println("");

  /* Initialise the sensor */
  if (!mag.begin(MMC56X3_DEFAULT_ADDRESS, &Wire)) {  // I2C mode
    /* There was a problem detecting the MMC5603 ... check your connections */
    Serial.println("Ooops, no MMC5603 detected ... Check your wiring!");
    while (1) delay(10);
  }
}

void loop(void)
{
  /* Get a new sensor event */
  sensors_event_t event;
  mag.getEvent(&event);

  float Pi = 3.14159;

  // Calculate the angle of the vector y,x
  float heading = (atan2(event.magnetic.y,event.magnetic.x) * 180) / Pi;

  // Normalize to 0-360
  if (heading < 0)
  {
    heading = 360 + heading;
  }
  Serial.print("Compass Heading: ");
  Serial.println(heading);
  delay(500);
}
The output of this example was this, I moved the sensor around
Compass Heading: 279.68
Compass Heading: 313.03
Compass Heading: 290.95
Compass Heading: 344.84
Compass Heading: 294.77
Links
https://media.digikey.com/pdf/Data%20Sheets/MEMSIC%20PDFs/MMC5603NJ_RevB_7-12-18.pdf