
In this article we look at another sensor – it is a BMP388 by Bosch Sensortec, so lets crack on and try this out with an ESP32 module again – Wemos Lolin32 for those that are interested
On with the manufacturers information from the website
BMP388 Information
The BMP388 is a very small, low-power and low-noise 24 bit absolute barometric pressure sensor. It enables accurate altitude tracking and is specifically suited for drone applications. The best-in-class TCO of the BMP388 between 0-65°C for accurate altitude measurement over a wide temperature range greatly enhances the drone flying experience by making accurate steering easier.
It is compatible for use with other Bosch sensors, including BMI088 for better performance, robustness and stability.
The BMP388 sensor offers outstanding design flexibility, providing a single package solution that is easy to integrate into other existing and upcoming devices such as smart homes, industrial products and wearables.
It is more accurate than its predecessors, covering a wide measurement range from 300 hPa to 1250 hPa. BMP388 exhibits an attractive price-performance ratio coupled with low power consumption. It is available in a compact 10-pin 2.0 x 2.0 x 0.75 mm³ LGA package with metal lid.
- Operating voltage: 3.3V/5V
- Communication interface: I2C/SPI
- Barometric pressure operation range: 300~1250hPa
- Barometric pressure absolute accuracy: ±0.40hPa (@900~1100hPa, 25~40℃)
- Barometric pressure relative accuracy: ±0.08hPa (@900~1100hPa, 25~40℃)
- Temperature coefficient offset: ±0.75Pa/K (@700~1100hPa, -20~65℃))
- Temperature absolute accuracy: ±0.5℃ (0~65℃)
- Possible resolution: 0.016Pa (high precision mode)
- Possible sampling rate: 200Hz
- Operating voltage: -40~85℃
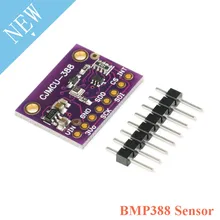
If you purchase a module they will have a 3.3v regulator on board, you will also have the option of I2C or SPI, here is the module that I located.
Parts Required
| Name | Link | |
| ESP32 | 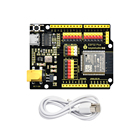 |
|
| BMP388 | ||
| Connecting cables |  |
Schematic/Connection
I decided to use the sensor in I2C mode
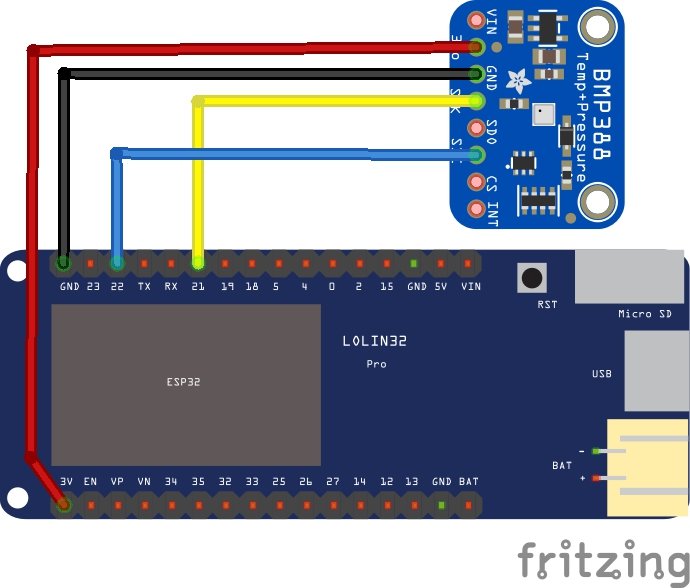
esp32 and bmp388
Code Example
I used the library from adafruit – https://github.com/adafruit/Adafruit_BMP3XX.
This library can be installed via the library manager. This is the default example and I have removed some of the SPI code and code comments since I was using the sensor in I2C mode
#include <Wire.h>
#include <SPI.h>
#include <Adafruit_Sensor.h>
#include "Adafruit_BMP3XX.h"


#define SEALEVELPRESSURE_HPA (1013.25)

Adafruit_BMP3XX bmp; // I2C


void setup() {
  Serial.begin(115200);
  while (!Serial);
  Serial.println("BMP388 test");

  if (!bmp.begin()) {
    Serial.println("Could not find a valid BMP3 sensor, check wiring!");
    while (1);
  }

  // Set up oversampling and filter initialization
  bmp.setTemperatureOversampling(BMP3_OVERSAMPLING_8X);
  bmp.setPressureOversampling(BMP3_OVERSAMPLING_4X);
  bmp.setIIRFilterCoeff(BMP3_IIR_FILTER_COEFF_3);
  //bmp.setOutputDataRate(BMP3_ODR_50_HZ);
}

void loop() {
  if (! bmp.performReading()) {
    Serial.println("Failed to perform reading :(");
    return;
  }
  Serial.print("Temperature = ");
  Serial.print(bmp.temperature);
  Serial.println(" *C");

  Serial.print("Pressure = ");
  Serial.print(bmp.pressure / 100.0);
  Serial.println(" hPa");

  Serial.print("Approx. Altitude = ");
  Serial.print(bmp.readAltitude(SEALEVELPRESSURE_HPA));
  Serial.println(" m");

  Serial.println();
  delay(2000);
}
Output
Open the serial monitor and you should see something like this
BMP388 test
Temperature = 23.84 *C
Pressure = 848.40 hPa
Approx. Altitude = 1472.89 m
Temperature = 26.95 *C
Pressure = 994.54 hPa
Approx. Altitude = 156.94 m
Temperature = 26.99 *C
Pressure = 994.53 hPa
Approx. Altitude = 157.01 m