
In this example we connect a PCA9685 LED controller to an ESP32
The PCA9685 is an I²C-bus controlled 16-channel LED controller optimized for Red/Green/Blue/Amber (RGBA) color backlighting applications.
Each LED output has its own 12-bit resolution (4096 steps) fixed frequency individual PWM controller that operates at a programmable frequency from a typical of 24 Hz to 1526 Hz with a duty cycle that is adjustable from 0 % to 100 % to allow the LED to be set to a specific brightness value. All outputs are set to the same PWM frequency.

Each LED output can be off or on (no PWM control), or set at its individual PWM controller value. The LED output driver is programmed to be either open-drain with a 25 mA current sink capability at 5 V or totem pole with a 25 mA sink, 10 mA source capability at 5 V.
The PCA9685 operates with a supply voltage range of 2.3 V to 5.5 V and the inputs and outputs are 5.5 V tolerant. LEDs can be directly connected to the LED output (up to 25 mA, 5.5 V) or controlled with external drivers and a minimum amount of discrete components for larger current or higher voltage LEDs.
Parts List
| Name | Link | |
| ESP32 | 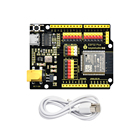 |
|
| PCA9685 module | ||
| Connecting cables | 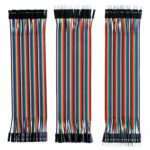 |
Layout
This example only shows one led connected, my test board had all 16 connected

esp32 and PCA9685
Code
You will need to add the Adafruit PWM Servo driver library – https://github.com/adafruit/Adafruit-PWM-Servo-Driver-Library/archive/master.zip
This is the default code, I commented out a couple of lines so this would compile for the ESP32
#include <Wire.h>
#include <Adafruit_PWMServoDriver.h>

// called this way, it uses the default address 0x40
Adafruit_PWMServoDriver pwm = Adafruit_PWMServoDriver();

void setup() {
Serial.begin(9600);
Serial.println("16 channel PWM test!");
pwm.begin();
pwm.setPWMFreq(1600); // This is the maximum PWM frequency

// save I2C bitrate
//uint8_t twbrbackup = TWBR;
// must be changed after calling Wire.begin() (inside pwm.begin())
//TWBR = 12; // upgrade to 400KHz!

}

void loop() {
// Drive each PWM in a 'wave'
for (uint16_t i=0; i<4096; i += 8)
{
for (uint8_t pwmnum=0; pwmnum < 16; pwmnum++)
{
pwm.setPWM(pwmnum, 0, (i + (4096/16)*pwmnum) % 4096 );
}
}
}