Another day another sensor hits the workshop.
In this example we connect a AHT20 Integrated temperature and humidity Sensor to an ESP32
First lets look at some information about the sensor from the manufacturer
AHT20, as a new generation of temperature and humidity sensors, has established a new standard in size and intelligence. It is embedded in a double row flat no-lead package suitable for reflow soldering, with a bottom of 3 x 3 mm and a height of 1.0 mm.
The sensor outputs calibrated digital signals in standard IAHT20, as a new generation of temperature and humidity sensors, has established a new standard in size and intelligence.
It is embedded in a double row flat no-lead package suitable for reflow soldering, with a bottom of 3 x 3 mm and a height of 1.0 mm.
The sensor outputs calibrated digital signals in standard I2C format. The AHT20 is equipped with a newly designed ASIC chip, an improved MEMS semiconductor capacitive humidity sensing element and a standard on-chip temperature sensing element.
| Supply voltage | DC : 2.0 – 5.5V |
| Measuring range (humidity) | 0 ~ 100% RH |
| Measuring range (temperature) | -40 ~ + 85 ℃ |
| Humidity accuracy | ± 2 % RH ( 25 ℃ ) |
| Temperature accuracy | ± 0.3 ℃ |
| Resolution | temperature: 0.01℃ Humidity: 0.024%RH |
| Response time | temperature: 5s humidity: 8s 1/e (63%) |
| Output signal | I2C signal |
This is the sensor that I bought
Parts Required
Here are the parts I used
The sensor you can pick up in the $6 price range – you can connect to the sensor using a standard header the classic dupont style jumper wire.
| Name | Link | |
| ESP32 | 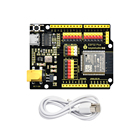 |
|
| AHT20 | ||
| Connecting cables | 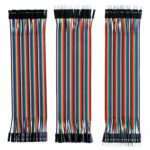 |
Schematic/Connection
The layout below shows an Adafruit Huzzah ESP32, I tried a couple of other ESP32 boards like the Lolin32 as well and they worked just fine
If you have an ESP32 board with a STEMMA QT cables, you can use these:
Black for GND
Red for V+
Blue for SDA
Yellow for SCL
I actually just extended and use this but in the layout I have shown that you can solder a header and just this as well – so you have a choice
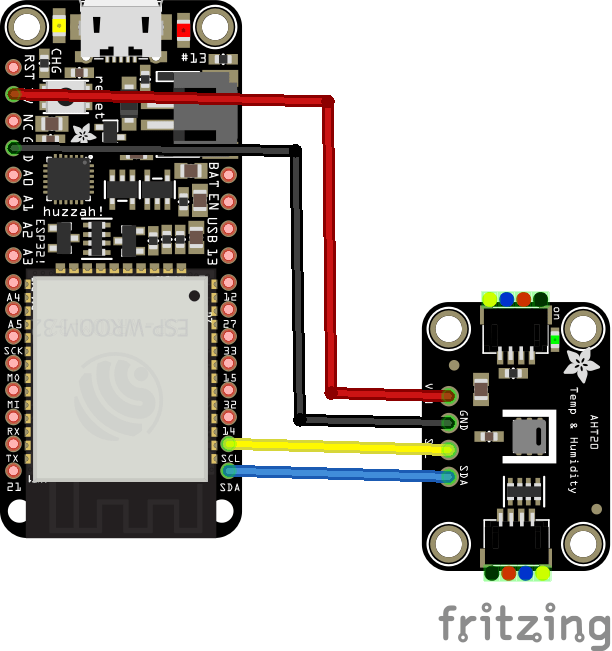
ESP32 and AHT20
Code Example
This example uses a couple of libraries, both of which can be installed using the library manager. if you search for the AHT20 one first and you are using a newer version of the Arduino IDE it will install the other one as well – which makes things a bit easier.
You need the Adafruit library for the AHT20 from https://github.com/adafruit/Adafruit_AHTX0
You also need an I2C support library from the same folks for the library above to work and that is available from – https://github.com/adafruit/Adafruit_BusIO
This is the simple test example that comes with the library
[codesyntax lang=”cpp”]
#include <Adafruit_AHTX0.h>

Adafruit_AHTX0 aht;

void setup()
{
  Serial.begin(115200);
  Serial.println("Adafruit AHT10/AHT20 demo!");

  if (! aht.begin())
  {
    Serial.println("Could not find AHT? Check wiring");
    while (1) delay(10);
  }
  Serial.println("AHT10 or AHT20 found");
}

void loop() {
  sensors_event_t humidity, temp;
  aht.getEvent(&humidity, &temp);// populate temp and humidity objects with fresh data
  Serial.print("Temperature: ");
  Serial.print(temp.temperature);
  Serial.println(" degrees C");
  Serial.print("Humidity: ");
  Serial.print(humidity.relative_humidity);
  Serial.println("% rH");

  delay(500);
}
[/codesyntax]
Output
Here is what I saw in Serial monitor
Temperature: 21.42 degrees C
Humidity: 52.41% rH
Temperature: 21.72 degrees C
Humidity: 54.38% rH
Temperature: 21.91 degrees C
Humidity: 56.12% rH
Temperature: 21.90 degrees C
Humidity: 57.22% rH
Temperature: 21.61 degrees C
Humidity: 56.53% rH